Rob Run · Looty Bay
Every heist, key and item in one place.
Know exactly what to bring, where to go, and what never to sell. Built for new criminals and veterans planning their next score.
Interactive map
Every target on the Looty Bay map. Tap a pin to see what's inside.
Heists & keys
Which key opens what, how many safes, and what to bring.
Item database
Tools, keys, fill items and valuables. Keep it or sell it?
Shipments to unlock
All 172 unlocks in the in-game tree, with the cost of every path and a planner.
Barter at Lenny's
Drill, Glass Cutter, ID Cards, decoders and badges.
Grow room & lab
Costs, payouts, timings and upgrades.
Base raids
Decoders, fuses and a break-in calculator.
Beginner guide
First hour, Day 1 plans, fill items and the weekly wipe.
Weapons compared
All 46 guns: damage, fire rate, shots to knock down and prices.
Timers
Federal raid clock, heist times, drills and logout.
New on the site
A plan for every target
Step-by-step gear list with costs, and what you might find inside.
ShipmentsThe in-game tree
All 172 unlocks. Tap one to see its whole path and price.
Weapons46 guns compared
Shots to knock down, DPS, magazine and price, plus armour and bags.
MapScout before you rob
Cameras, alarm panels, safes, clan businesses and event cargo.
TimersYour raid countdown
Copy the Federal raid time from the game once, and the site counts down for you.
Game tip
The route to your first million
- ScoutDrive Looty Bay unmasked. As a Citizen you lose nothing.
- Small safesGreen Safe Keys and corner stores. Fast and quiet.
- Bank itCash you carry can be stolen. The bank can't be.
- Get a plotUnlocks laundering, cargo, a garage and the grow room.
- Go bigMini Drills, room keys, then the bank vault with a crew.
Weekly Federal Raid. Each server has its own 7-day clock ("Federal raid in" in game). When it hits zero the feds take everything you own in that state, even money in the bank. Only B-Coin is safe. See timers.
Looty Bay
Heist map
Every target, color-coded by what it needs. Tap a pin for the full breakdown, or drag and zoom to explore.
In-game map. Drag to move, pinch or scroll to zoom. Turn services on and off above.
Selected
Tap a pin
Pick any target on the map to see what's inside and what to bring.
Pin color = what opens it
28 targets
Heists & keys
Each target lists what's inside, the exact keys and tools to bring, and the best loot. Tap any key or tool to see where to get it.
Payouts are the Fence's base price. Guaranteed means the cash and items that always spawn. Random finds vary, and a high Notoriety level makes the Fence pay up to 50% more.
How keys work
Safe Key
Opens one small safe in one specific building. The easy money.
Room Key
Opens a locked or hidden room, usually with large safes inside. Bring a Mini Drill for them.
Keycards & ID Cards
Vaults and secure rooms in the big buildings. The two ID Cards come from barter.
Keys only work while you're masked. Don't sell them: a Fence pays about $500, while the safe behind one can hold $100,000 or more.
Before every heist
- Scout unmasked. Find the back door and the orange electrical panel.
- Pack: lockpicks, the key, a Mini Drill for the safes, a USB for the computer, and your Code Tablet and Action Camera so they fill up.
- Park behind it, facing out. At the Downtown gas station, park in the garage and shut the doors.
- Mask up away from the door, then cut the power at the panel or shoot the cameras.
- Lockpick the back door and aim at every employee so nobody hits the alarm. Three civilian kills fill your Wanted meter.
- Loot, leave, sell at once. Cash left on the counter can be taken.
Database
Items
Red KEEP tags mark items worth far more traded or used than sold. Tap any item for details.
No items match.
Names, descriptions and icons come from the game files. Sale prices are base values before Notoriety bonuses, shown where known.
Lenny's Motel
Barter trades
Trade with Lenny or at the Suspicious Door at Lenny's Motel. The motel is a safe zone. "Full" means the item's meter is filled up.
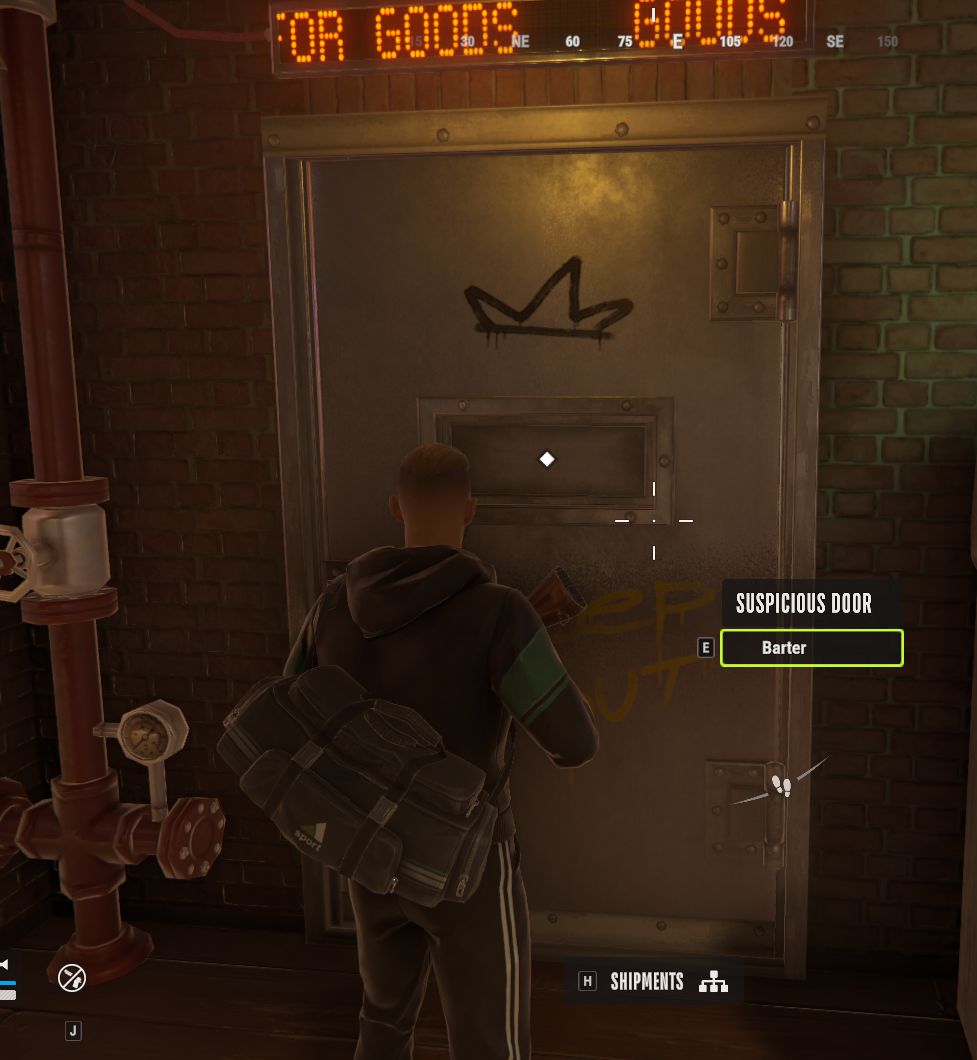
Where to trade
Find the Suspicious Door
- Go to Lenny's Motel, the safe zone you reach after breaking out of prison.
- Look for a heavy steel door in a brick wall, with a black crown sprayed on it and an orange LED sign above.
- Walk up and press E → Barter. Bring the items for the trade with you, in your bag.
A full purple Action Camera sells for about $100,000, but it's also the only way to get the Drill. Want the bank vault? Keep it.
How fill items fill up
| Item | How it fills | Used for |
|---|---|---|
| Action Camera | Crimes done at the Notoriety level the camera asks for: 40, 70 or 100 points by tier. Players report about 1 point per cabinet or drawer, 5 per drilled safe and 10 per bank safe. | Drill, purple Decoder |
| USB Hacking Tool | Hack Secured Computers, 1–2 points each, 5 to fill | Drill (needs 1 full) |
| Code Tablet | Crack 4 safes | Glass Cutter (needs 1 full) |
| Deposit Box Keys | Crack deposit boxes in the bank, 60 points to fill | Bank gold vault ID Card |
| Cargo Sheet | 1 point per Smuggler delivery, 5 / 12 / 36 to fill | Sell full: $60k / $80k / $300k |
| Evidence | Collected while playing, stacks | Police armory ID Card (needs 20) |

Passive income
Grow room & chemical lab
Both are buildings on your own plot, so you need a house first. They make the steadiest money in the game, but the weekly Federal Raid takes them, so build early in the week. Unlock everything in Larry's tree (Production) and buy it on your base's Trade Laptop.
To start
$320kGrow Room + 1 table, research included
Full room
36 bushes6 tables × 6 bushes
Defence
5Low, with 9 fuse slots. Fit fuses early.
How it works
 Find a bushCargo found in the city
 Put it on a Grow TableA clock shows while it grows
 Mature bushThe clock turns into a tick
 Harvest (5 s)2–4 Harvest Bags
 Sell to a FenceThe bush regrows by itself
Where bushes spawn: in the back room of Pharmacies (look through the door window, near the rack on the right), in the two south-west hotels, and inside houses. Players also report them in the Gear Store, Gun Shop and around Rusty's Burgers. See Day 1 plans.
Bush tiers
 Uncommon
- Bag
- $4,000
- Per harvest
- $8k–16k
- Smuggler
- $20k growing · $30k ripe
 Epic
- Bag
- $6,000
- Per harvest
- $12k–24k
- Smuggler
- $30k growing · $45k ripe
 Legendary
- Bag
- $8,000
- Per harvest
- $16k–32k
- Smuggler
- $40k growing · $60k ripe
A bush keeps its tier when it regrows. Some settlement buildings add 1–2 extra bags per harvest. Keep a bush rather than selling it: a few harvests beat the Smuggler price.
Upgrade path
Grow Room + Grow TableResearch $150k + $30k · Buy $100k + $40k per table Fan+12% fasterResearch $100k · $25k per table
 Water Pump+14% fasterResearch $200k · $70k per table · level 2 district
 UV Lamp+24% fasterResearch $500k · $250k per table · level 3 district
Each table has 3 upgrade slots, so all three fit at once. A second table (6 more bushes for $40k) is worth more than a Fan, so fill tables first.
Grow room calculator
To start
$390kLab, reactor, freezer and Lab Table, research included
Best product
$75kOne Legendary Hard Crystals tray to the Smuggler
Defence
3The weakest building, with 6 fuse slots
How it works
 Reagent canistersBlue or red cargo, often in pairs
 Chemical ReactorMakes Crystalline Concentrate
 ConcentrateRarity is random
 Industrial FreezerTurns it into Hard Crystals
 Hard CrystalsSell to the Smuggler
 Lab TableCrush into powder for the Fence
Where reagents spawn: two spots inside the Gas Station garage, the back room behind the Gas Station, and the Electronics Store back room to the north. Quality Reagents give better crystals.
What each tier sells for
Uncommon- Concentrate
- $10,000
- Hard Crystals
- $30,000
- Powder
- $1,000 each
 Epic
- Concentrate
- $15,000
- Hard Crystals
- $45,000
- Powder
- $2,000 each
 Legendary
- Concentrate
- $25,000
- Hard Crystals
- $75,000
- Powder
- $4,000 each
Freezing triples the value, so always freeze before you sell. Concentrate and crystals go to the Smuggler, and powder goes to the Fence.
Upgrade path
Build these first (Tier I)
 Chemical Laboratory$160k + $110kChemical Reactor$20k + $40kIndustrial Freezer$15k + $20k · 4 places
 Lab Table$10k + $15k
Prices are research + buy. You need all four before you can cook.
| Upgrade | Effect | Tier | Research + buy |
|---|---|---|---|
| Reactor: better crystals | |||
 Industrial Engine | Slightly better odds | I | $10k + $20k |
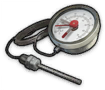 Industrial Thermometer | Noticeably better odds | II | $50k + $120k |
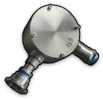 Chemical Converter | Much better odds | III | $150k + $300k |
| Reactor: bigger and faster | |||
 Chemical Reactor II | More, shorter cycles | II | $150k + $300k |
 Chemical Reactor III | Most, fastest cycles | III | $350k + $700k |
| Freezer: more places, faster | |||
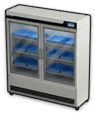 Industrial Freezer II | 6 places | II | $30k + $90k |
| Industrial Freezer III | 8 places | III | $100k + $250k |
 Improved Evaporator | 11.7% faster | II | $40k + $100k |
 Quality Refrigerant | 13% faster | III | $100k + $250k |
| Lab Table | |||
 Laboratory Scales | Fits on the Lab Table. Needs 335 years of jail time. | II | $15k + $15k |
Best first buy: the Industrial Engine ($30k in total) for better odds. Next, the second reactor for more output. All three reactor add-ons fit at once, and so do the evaporator and refrigerant.
A running lab puts smoke above your building, which shows raiders where you are. If cooking is interrupted, the cargo drops and the reagent in the reactor is lost. Cargo drops if you draw a weapon, and the Police can take it.
Larry's tree
Shipments
Shipments are unlocks. Research one on the Trade Laptop with dirty cash and its item goes on sale on the Black Market, where you still pay the item price each time. Most need the shipment before them, higher tiers need a higher-level district, and a few also need total jail time. Researching all 172 costs about $36.2M.
Your plan
$0Tick shipments below to add up their research cost. Your ticks are saved on this device.
Every shipment (172)
Grouped the way the Trade Laptop shows them. An indented shipment needs the one above it first. Tap a shipment to see everything you have to research before it, then add the whole path to your plan.
Tap any shipment in the tree to see its cost, what comes before it and the total path price.
Shipments that need jail time
Jail time comes from the weekly Federal Raid and adds up across weeks. These unlocks need a minimum total.
| Shipment | Jail time | Research | Black Market |
|---|
Cars and trunk space
Rows are trunk inventory rows for items, cargo is how many cargo boxes fit, and rack slots take Cargo Racks. "Max cargo" assumes a Reinforced Cargo Rack (+2) in every slot.
| Car | Rows | Bag slots | Cargo | Rack slots | Max cargo | Research | Price | Tier |
|---|---|---|---|---|---|---|---|---|
| Fukurou Tensa Cheap everyday car | 2 | 1 | 1 | 1 | 3 | $50k | $200k | I |
| Longhorn Van Best cargo car | 8 | 2 | 6 | 3 | 12 | $50k | $180k | I |
| Royal E Sedan | 3 | 1 | 2 | 1 | 4 | $200k | $1M | II |
| Longhorn Titan Strong, roomy SUV | 6 | 2 | 6 | 1 | 8 | $200k | $900k | II |
| Royal J Crossover | 6 | 3 | 4 | 2 | 8 | $500k | $4M | III |
| Longhorn Wild Fast acceleration | 3 | 1 | 1 | 1 | 3 | $500k | $4.5M | III |
| Buletti Soltempra Top speed, no cargo | 2 | 1 | 0 | 0 | 0 | $2M | $10M | III |
Car upgrades
| Part | Improves | Research | Price | Tier |
|---|---|---|---|---|
| ECU → Improved → High-performance | Top speed | $30k · $160k · $260k | $14k · $75k · $330k | I · II · III |
| Turbo Kit → Improved | Acceleration | $110k · $210k | $79.5k · $238k | II · III |
| Intercooler → Improved | Acceleration | $120k · $200k | $72k · $270k | II · III |
| Steering Rack → Reinforced | Handling | $100k · $220k | $68k · $270k | II · III |
| Racing Rotor | Handling | $100k | $61.5k | II |
| Trunk Bags → Large → Spacious | +1 / +2 / +3 rows | $20k · $130k · $220k | $1.2k · $70.5k · $270k | I · II · III |
| Cargo Rack → Reinforced | +1 / +2 cargo | $150k · $250k | $86.5k · $350k | II · III |
| Police Radio (car) | Shows patrol cars and the event feed | $200k | $300k | III |
You need a house to own a car, and rentals can't be upgraded. To fit a part, open the hood and drag it into its slot. Parts stay on the car when you die, which makes them one of the safest buys. The Longhorn Van with three Reinforced Cargo Racks carries 12 cargo, the most of any car.
Collection Table upgrades
| Upgrade | Unlocks | Research + buy | Tier |
|---|---|---|---|
| Collection Table | 7 basic collections | $5k + $15k | I |
| Additional Collection | 7 more | $25k + $34k | I |
| Special Collection | 10 special | $50k + $100k | II |
| Unique Collection | 10 unique | $100k + $250k | III |
That's 34 collections in all. Items a current collection needs get a special icon in your inventory. When a set is complete, press Pack to get a Collection Crate. The crate is cargo, so carry it to the Smuggler: drawing a weapon drops it and the Police can seize it. Stuck on a set? The table can swap it for a new one, then you wait before the next swap.
PvP
Base raids
Your plot is a PvP zone. Raiders hack Security System panels with Breach Decoders, and you defend by adding fuses.
Break-in calculator
Attacking
- Each decoder takes 12 s and removes defense: green −1, purple −3, gold −5.
- At 0 the building opens for a while, until the owner repairs it.
- Safes and security cabinets inside still need a Master Key.
- Hack the gate from outside. Players who jump the fence get stuck.
Defending
- Green fuse +1 · $20k. Purple +3 · $100k. Gold +5 · $250k.
- Fuses survive a hack.
- Each panel has 3 alarm slots. The best alarms also warn your clan.
- A small house has 27 fuse slots.
Every building's defence
"Max" means every fuse slot holds a gold (+5) fuse. Decoder counts are green / purple / gold decoders needed to reach zero.
| Building | Base | Fuse slots | Max | Decoders, no fuses | Decoders, max |
|---|---|---|---|---|---|
| Trailer | 5 | 9 | 50 | 5 / 2 / 1 | 50 / 17 / 10 |
| Small House | 15 | 27 | 150 | 15 / 5 / 3 | 150 / 50 / 30 |
| Mansion | 30 | 42 | 240 | 30 / 10 / 6 | 240 / 80 / 48 |
| Car Garage | 4 | 6 | 34 | 4 / 2 / 1 | 34 / 12 / 7 |
| Large Car Garage | 6 | 12 | 66 | 6 / 2 / 2 | 66 / 22 / 14 |
| Warehouse | 10 | 15 | 85 | 10 / 4 / 2 | 85 / 29 / 17 |
| Workshop | 5 | 9 | 50 | 5 / 2 / 1 | 50 / 17 / 10 |
| Grow Room | 5 | 9 | 50 | 5 / 2 / 1 | 50 / 17 / 10 |
| Chemical Laboratory | 3 | 6 | 33 | 3 / 1 / 1 | 33 / 11 / 7 |
| Mesh Fence | 2 | 3 | 17 | 2 / 1 / 1 | 17 / 6 / 4 |
| Metal Fence | 5 | 6 | 35 | 5 / 2 / 1 | 35 / 12 / 7 |
| Concrete Fence | 10 | 9 | 55 | 10 / 4 / 2 | 55 / 19 / 11 |
A Farm Fence has no defence and can't be hacked. Work out any setup yourself: base + every fuse's points, divided by the decoder's points, rounded up.
Fuses, decoders and alarms
| Item | Effect | Research | Price | Tier |
|---|---|---|---|---|
| Electronic Fuse (green) | +1 defence | $10k | $20k | I |
| Electronic Fuse (purple) | +3 defence | $150k | $100k | II |
| Electronic Fuse (gold) | +5 defence. Also barter: purple fuse + $250k | $500k | $250k | III |
| Decoder (green / purple / gold) | −1 / −3 / −5. Purple = barter 3 green + $10k, or a full Action Camera | — | — | — |
| Alarm System I | Warns everyone at the location | $15k | $30k | I |
| Alarm System II | Warns you | $25k | $60k | II |
| Alarm System III | Warns you and your whole clan | $50k | $200k | II |
After a raid
- Repair the panel on each hacked building. Fuses survive, so full defence comes back.
- During the raid block you can't move or edit your base, and your vendors, Black Market and Shipments are blocked.
- The building hit first is usually your weakest. Put your next fuses there.
Defence tips
- Fuse the money makers first. The lab (base 3) and grow room (base 5) are the easiest targets.
- A clan alarm is worth it if your clan is online: every decoder takes 12 s, which gives help time to arrive.
- First Aid Cabinets let you heal and respawn right next to them inside your base.
- Close your front door when you leave. There are no police outside Looty Bay.
The Eviction Right (50 purple Decoders at Lenny's) removes a rival's whole plot once every panel is hacked.
Arms
Weapons compared
All 46 guns side by side. The number that matters most in a fight is how fast a gun knocks someone down, so the list starts with that. Prices are the Trade Laptop price and the one-time research in Shipments. The Arms Dealer sells to Citizens at three times the price.
"Knockdown" is the number of body shots and the time from the first shot to knock down a player with 100 health, inside the gun's full-damage range. Headshots do 1.5 times the damage. Mk2 and Mk3 versions hit the same but aim faster and carry more rounds.
Body armour, bags and belts
Armour soaks damage before your health goes down. A Steel Plate repairs it in about 1.3 seconds, and you can use one on the move. Bags add inventory rows and belts add quick-access pockets.
| Item | Stat | Buy | Research | Tier |
|---|---|---|---|---|
 Light Body Armor | 25 | $4k | $5k | Any |
 Medium Body Armor | 50 | $15k | $15k | Any |
 Assault Body Armor | 75 | $70k | $250k | II |
 Heavy Body Armor | 100 | $140k | $500k | III |
 Bastion Body Armor | 100 | Loot only | — | — |
 Sports Bag | 2 rows | $5k | $5k | Any |
 Sports Bag | 4 rows | $15k | $35k | II |
 Sports Bag | 6 rows | $40k | $150k | III |
 Versatile Pouch | 1 pockets | $250 | $5k | Any |
 Versatile Pouch | 2 pockets | $1.2k | $10k | Any |
 Versatile Pouch | 3 pockets | $2.7k | $25k | II |
 Versatile Pouch | 4 pockets | $12k | $50k | III |
 Steel Plate | repairs armour | $1k | $5k | Any |
| Steel Plate | repairs armour | $5k | $100k | III |
Plan around the clock
Timers
The clocks that decide how a run goes: the weekly raid, how long each job keeps you inside, drills, and logging out.
Federal raid (the wipe)
Every server ("state") runs its own 7-day clock. Watch the Federal raid in countdown in game, because there is no single time for everyone. When it ends, the feds confiscate everything you own in that state and you're sent to prison. The more they take, the longer your sentence and the more authority you earn.
- Claim your mail first. Unclaimed rewards are lost when you switch server.
- B-Coin is the only thing the feds can't take.
- You can change region only while in prison. Pick a fresh server to get the full 7 days.
- Surrendering to the feds ends your run early, with the same result.
Your server's countdown
Copy the "Federal raid in" time from the game. This page then counts down for you, even after you close it.
| Event | Your time | Starts |
|---|
Shown in your own time zone. A conflict only happens if another clan contests a claim. For a district conflict, the clan picks a start time (every 30 min in the window). Business events run every 4 hours in both regions. The East US district conflict window is estimated from the EU pattern.
Quick reference
Clan events
…Business conflicts every 4 hours. Tap for the full schedule.
Wipe cycle
7 daysPer server, counted from the day it opened.
New servers
17:00 UTCEU, daily. East US opens at 01:00 UTC (8 PM ET).
Shop safe drill
60 sDrilling a shop's safe. Stay alert the whole minute.
Bank deposit box
≈ 1.5 sEach, by hand. 12 boxes ≈ 18 s, and they fill your Deposit Box Keys.
Bank job
≈ 6 minInside time for the full bank. The Drill warns the whole city the moment it starts.
Logging out
Exit timerThe game closes but your character stays in the world, vulnerable, until the timer ends. Much longer in enemy territory.
Knocked out
Revive timerA teammate can pick you up before it runs out. After that you die.
Server restart
WarningThe game counts down hours, then minutes, then seconds. Get to safety.
Time inside, per target
Rough active time to clear each building: drilling, cracking and grabbing. Driving and escape aren't included. Tap a row to open the target.
| Target | District | Guaranteed | Time |
|---|
Grow room and lab timings are on the Grow room & lab page. Times were cross-checked with the MetaForge heist planner. The developer doesn't publish official numbers.
New players
Beginner guide
Everything a new player needs, in the order you'll need it: your first hour, how to make your first $100k, what to do with fill items, how to stay alive, and what you keep when the week ends.
Your first hour
- Break out of prison. Every run starts in the County Prison. Talk to the Tattoo Artist, then use an escape point.
- Meet Lenny at Lenny's Motel. It's the hub and a safe zone, so no weapons work there. His laptop is your Black Market until you own a base.
- Rent a car at the motel and drive off. Crossing the edge of the area opens the global map, where you pick Looty Bay.
- Party up fast. Players clear the Gun Shop and Equipment Store in the first minutes of a new city. Hit them early for free weapons and armor, then rob the rest of the city with gear on.
- Mask up somewhere quiet. The mask makes you a Criminal. Grab something valuable, sell it to a Fence ($ van), and get out of the city.
- Open a bank account and launder your cash. Cash on you can be stolen. Money in your account can't.
Grab every plant and reagent canister you see, even if you don't have a grow room or lab yet. A canister can make $200k+ in about an hour in a lab, and players with grow rooms will buy bushes from you.
Roles
Citizen
- Keep everything if you die
- Free healing
- No weapons
Criminal
- You become one when you put on a mask
- You lose your whole inventory if you die
- Loot is only yours once you leave the city
Police
- Join at the Police Station, no badge needed
- Free gear and car, and you keep your inventory if you die
- Can only attack Criminals. Max 4 cops.
Playing Police
Going on duty is the safest way to earn early: the department gives you a uniform, weapons and a car, and you don't lose your inventory if you die. Your own gear is held while you're on shift and handed back when you clock out.
How you get paid
- Lawful actions pay straight into your bank account
- At the end of the shift, collect your salary from the officer. It's paid mostly in confiscated goods, and only a little in cash
- Each shift has an earnings cap, and the game tells you when you hit it
Arrest, don't kill
- You can cuff a Criminal who has surrendered (hands up) or been knocked out
- An arrest pays the most. The Criminal keeps their gear but loses their bag
- A kill pays less. Killing someone who surrendered pays nothing
- Guard the arrest, because other Criminals can free them
- An arrested Criminal can offer you a bribe from their bank account
Boost your pay
- Surrender Order: bonus on the next arrest
- Siren on: bonus for lawful actions, and it calls nearby officers
- Backup calls: accept one for a timed salary bonus and free gear
- Ram cars to slow them down. The Police can also close the bridges out of the city for a while
Badges (Sergeant, then Lieutenant, then Captain) unlock better duty gear. Each badge is used up when you take that rank's loadout, so dying on duty means you need a new badge. Traffic offences still count: at violation level 10 you're held at the station for a while.
What do I lose?
Day 1 plans tips from experienced players
Each building you rob raises the loot tier ("reward level") for the run. Build it up on cheap buildings, then sell at safe moments.
- Grand Hotel first. Two players take one locked room each, while the third smashes the main lobby. Ignore the alarm. This takes rewards to about level 2.5.
- Mansion and houses next, until you reach level 3 rewards.
- Sell at the north beach Fence. It's usually the safest place to sell.
- Use the keys you looted (safes and locked rooms) until you reach level 4.
- Sell again. If the city is quiet, keep going to level 5 first.
- Leave the city once each player carries at least $150k–200k.
Fast, low-risk money for a solo player or a pair.
- Pair your keys. If you have a Room Key, try to also get the green Safe Key for the same building.
- Kill the alarm first: break the cameras or breach the electrical panel.
- Loot the room. Bring Mini Drills if it has locked safes.
- Clear the whole building, then leave and sell at the hangar.
The Heists page shows every key, what it opens and how many safes are inside.
No gear needed. Take a rented, fast car and stay a Citizen until you see the item, then mask up, grab it, and leave the city. Store it on a rack at your house and repeat.
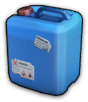
Reagent canisters
- Gas Station garage: 2 spots inside.
- None? Break into the back room behind the Gas Station.
- Still none? Try the Electronics Store back room to the north.
- Nothing anywhere? Leave and come back into the city.
Bushes (plants)
- Look through the door window of a Pharmacy back room. They spawn near the rack on the right.
- None? Check the two south-west hotels, in corners and on tables.
- Still none? Look inside houses through the windows as a Citizen.
No lab or grow room? Sell them to a player who has one, or hand them to your clan. Cargo drops if you draw a weapon, and the Police can take it.
Safe action with nothing to lose. Players report $150k+ before the city resets.
- Sign in at the Police Station. You get free gear and a car, and you keep your own inventory if you die.
- Arrest, don't kill. An arrest pays the most. A kill pays less, and killing someone who surrendered pays nothing.
- Boost your pay with the Surrender Order, the siren on your car, and backup calls from the department.
- Trade up badges. 15 Sergeant's (green) badges barter for 1 Lieutenant's (purple) at the Suspicious Door, so you're ready when someone hits a big building.
Your pay is mostly confiscated goods, given at the end of the shift, and each shift has an earnings cap.
- Day 1: districts can't be bid on yet, only businesses. Bid the minimum on as many small businesses as you can. Many won't be contested, so you win them without a fight.
- Fund gear sets from the clan for members who fight in conflicts.
- Day 2: one big bid on one district to make sure you get a fight you can staff. Small bids on many districts can leave you with more fights than players.
- Pay for plants and reagents from the treasury, so members are rewarded right away and the grower or cook pays the clan back.
Conflict and sit-down times are on the Timers page.
Starter kit $44,399 in total
Most Black Market items cost you twice: research once on the Trade Laptop, then the item price each time you buy one.
 DP-9 Mk1No research · $300
 Lockpick$5,000 + $99
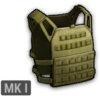 Light Body Armor$5,000 + $4,000
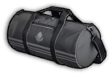 Sports Bag$5,000 + $5,000
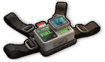 Action Camera$5,000 + $15,000
One full Action Camera sells for $50,000, which pays back the whole kit. After the first one, every new camera costs only $15,000.
Fill items: what to do with them
These items fill up as you play. A full one either sells for a lot or trades at the Suspicious Door for a heist tool. You lose them if you die as a Criminal, so don't carry a nearly full one into a risky fight.
The order to unlock them
Action Camera$5k research Code Tablet$25k
 USB Hacking Tool$50k
 Deposit Box Keys$100k
Get the Code Tablet early: it's cheap and fills after just 4 safes. The USB Hacking Tool pays best per point. Only fill Deposit Box Keys if you want the Bank gold vault, because a full set sells for just $20,000.
Selling & money
Fence ($ vans)
Buys stolen items, grow room harvests and lab powder. Four of them in Looty Bay, shown on the map.
Smuggler (Cargo Exchange)
Buys cargo: bushes, crystals, collection crates and contraband. Bigger deliveries pay much more. Each delivery also fills your Cargo Sheet.
Sales Center
One in each district. Only players who rent a plot there can trade, and it pays by district level.
Notoriety
Rises as you break the law. Higher levels pay more at the Fence and the Smuggler, and give more extra loot. Solo Mode starts you at level 4, Duo at level 2.
Collections
With a Collection Table at home, pack marked items into a crate that's worth more than the items alone. Sell the crate to the Smuggler.
Laundering
Needs a bank account and a Laundering Desk at your base. It works offline, and Banknote Counters speed it up. Lenny launders too, for a cut.
Staying alive
Before the job
- Park facing the exit.
- Lockpicking never sets off the alarm. Breaking glass can.
- Break cameras first, or breach the electrical panel to kill cameras and the alarm together.
- Aim at shop workers to stop them calling the Police.
The getaway
- Your loot is only safe once you've left the city.
- The Police can block the bridges, so know a second way out.
- Lose cops in turns, not on straight roads.
- Switching cars drops everything in the old trunk.
If it goes wrong
- Surrender (Q) and you lose only your bag, not your gear.
- Offer a bribe from your bank account to leave with everything.
- Hide in bushes, cabinets and dumpsters. Your name tag disappears too.
- Quitting doesn't save you. Your character stays in the world for a while.
Don't kill Civilians. It raises your Wanted level. At level 3 you're Most Wanted, with a bounty, and everyone can see where you are. Drilling the Bank Vault and the Grand Hotel exhibit are announced to the whole city, so plan your exit first.
Your base
- Research the Land Plot Title on the Trade Laptop, then buy it.
- Find a settlement that has an owner and a free plot with a rental sign. Sign it.
- Place your house with the plot plan. The title's level must match the district's level.
- Add a Laundering Desk first, then a Cargo Workbench and racks to store cargo.
- When you can afford it, add a Grow Room or Chemical Lab for passive income, and fit fuses so raiders have a harder time (raid calculator).
What to unlock first
| Path | Order | Research |
|---|---|---|
| Everyone | Lockpick → Sports Bag → Light Body Armor → KL-545 Mk1 | $40,000 |
| Heister | + Cargo Workbench → Medium Armor → Action Camera → Code Tablet → Mini Drill → bigger bag → USB → Deposit Box Keys | $375,000 |
| Grower | Grow Room → Grow Table → Fan → Water Pump → UV Lamp | $980,000 |
| Cook | Chemical Lab → Reactor → Freezer + Lab Table → Industrial Engine | $215,000 |
| Police | Sergeant → Lieutenant → Captain's Badge | $730,000 |
You pay for research with dirty cash. Higher tiers need a higher-level district, and a few unlocks also need total jail time, such as the Police Radio (60 years) and Laboratory Scales (335 years).
The weekly wipe (Federal Raid)
Each server lasts about 7 days, on its own clock, so watch the "Federal raid in" timer in game. When it ends, the feds take everything you own in that state and you go to prison. The more they take, the longer your sentence, and jail time is what unlocks tattoos and some shipments.
The feds take
- Money, cars and property
- Your base, grow room and lab
- Contraband and crypto farms
You keep
- Tattoos and authority
- Your total jail time
- B-Coin, bought with credits
Do this
- Claim your mail rewards
- Spend Season currency if a new Season is coming
- Move spare value into B-Coin
- Don't panic-sell: what they take becomes jail time
You can only change region while you're in prison. Pick a fresh server then, so you get a full 7 days.
Changing server and playing with friends
You live on one server ("state") at a time, and parties only work between players on the same one. There's no server menu: to move, you surrender to the feds.
Move to another state
- Settings → Other → Surrender to Feds, then confirm
- You go to prison. Talk to the Tattoo Artist
- Use an escape point and pick the state you want
What you give up
- Everything you own in the old state: base, property and items
- Unclaimed mail rewards, which only count on the server they were sent to
You keep your jail time (the sentence adds to it), your tattoos and B-Coin. Players living in the Highlands can move and keep their property, but that's where the strongest players are.
Join a friend
- Ask which state they're on. One of you moves there as above
- Then invite them from the player menu
- To enter a location together, everyone has to be on the global map
- In Looty Bay the whole party plays the same role
- You can't invite someone who is in a clan conflict
Before you switch, claim your mail and spend what you can. New states open as the old ones fill up, so a fresh one gives you a clean start with a full week before its Federal Raid.
Lenny's $1,000,000 debt
You owe Lenny $1,000,000. Paying it off is optional, and you can only pay it with clean credits (laundered money in the bank), not dirty cash from robberies.
Permanent rewards
- New Chapter outfit, male and female, in the Skin Center
- 10 years of jail time added to your total without going to prison, which helps unlock jail-time shipments
- The "Pay your debt to Lenny" achievement
No gameplay boost
- No new mechanics, stash space or discounts
- The money is gone, and early on you need those credits for property, weapons and police bribes
Late, not early
- Wait until your base is set up and you have spare laundered money
- A good moment is just before a Federal Raid: the feds would take that money anyway, and the rewards are permanent
Prison, jail time & tattoos
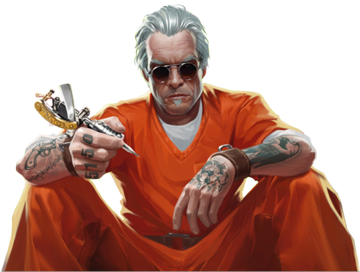
After each Federal Raid you serve a sentence in the County Prison. The more the feds took, the longer it is. Your total jail time never resets, and it's what unlocks tattoos, parts of the prison and some shipments.
- Your first sentence gets you a tattoo from the Tattoo Artist. After that, the tattoo screen shows how many more years you need for the next one.
- There are 23 tattoos, from Fearlessness to Prayer, and they stay with you after every raid.
- Some prison doors say "Longer jail time required".
- Use an escape point to leave. You can pick which state to escape to, and you can only change region while you're in prison.
- Surrendering to the feds early ends the run, with years taken off for giving yourself up.
Shipments that need jail time are listed on the Shipments page.
Every tip from the game
These are the game's own loading screen tips, grouped by topic.
Your checklist
Unofficial fan site. Not made by or affiliated with the developer of ROB RUN. All game names belong to their owners.
The developer doesn't publish official numbers. Values are cross-checked across fan databases and player reports for build 0.7 (November 2026). If it doesn't match your game, the game is right.